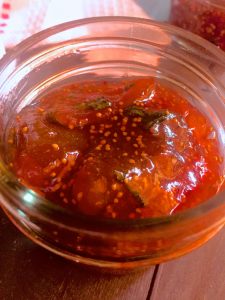
As I usually do, I researched quite a bit before making the jam, from my two reliable jam cook books and a number of recipes online. There are a myriad recipes out there for fig jam, but somehow none of them gave me the right information on ingredient measurement and proportions. For some reason most of them gave the weight of the figs (in lbs) and the corresponding volume of sugar (in US cups). As I didn't have figs of the same weight as in the recipes, it was difficult to calculate the proportionate sugar required.
What really helped was this link from Serious Eats that Mridula gave me (and which I have in turn now shared with my jam making friends). This is all you will need if you are new to making jam or even if you are an old hand but would like to understand the whys and wherefores of jam making. It helped me to plan the recipe, to know what to look out for and to turn out a perfect jam (I know Im the one saying it, but really, the homemade fig jam has turned out so delicious and with the right consistency. Ask my friend Nisha, she is my taste tester and she said she loved the jam!) I also planned my instructions based on the recipe for apricot jam on the same site.
So now you have my 'ready for a beginner' recipe showing you how to make homemade fig jam, how to work out the proportions for ingredients, how to test for 'doneness' (I used the frozen spoon test from the Serious Eats article to which I have given the link above.
Some Kitchen Hints while making Homemade Fig Jam:
- There is no need to peel the figs. They cook down soft and add to the texture of the jam.
- If using semi ripe figs, first cook them on low heat in very little water - about 30 ml or ⅛ of a cup, for about 10 minutes, stirring frequently. Add a little more water (a tablespoon at a time) if you find it becoming dry. When the fruit softens up, transfer it to a bowl, add the sugar and lime juice and let it stand for 15 minutes as in the instructions below. Continue as per the instructions.
- Don't leave the jam unattended at any time during the making. Make sure you are stirring it frequently, specially when you first set it to cook and towards the end when it thickens, and of course in-between. There's nothing sadder than jam which has caught and scorched at the base of the pan.
- If the jam is runny when you think it is done and fails the spoon test, running down the spoon, (see instructions below) - well, it is not done! Set it back on the stove and let it cook some more, stirring again, and then do the test once more after 5 minutes or so.
- If the jam is overdone and hard and doesn't glide down the spoon at all even when hot and is hard to the touch- it is overcooked. You can try to remedy it by heating some water (very little -about ¼ cup or less), add the jam and cook on low heat, stirring frequently. Once it softens, try the spoon test again.
- Proportions for Ingredients: Following the principles in the Serious Eats article above:
i. Sugar - I added 50% of the weight of the sliced figs, hence 200 gms sugar for 400 gms figs.
ii. Lemon juice - 1 tablespoon (½ oz/ 30 gms) for 500 gms (1 lb)of sliced fruit worked for me. You may use upto another ½ tablespoon of lemon juice if the jam tastes sweet without a hint of the tartness. As in the instructions below, add the lemon juice a little at a time, till the taste is a balance of sweet and tart with just a hint of the tartness.
You don't need much equipment for making this jam. But arm yourself with a weighing scale and/or at least a set of measuring cups and spoons. That way you don't have to break your head about the quantities and proportions.
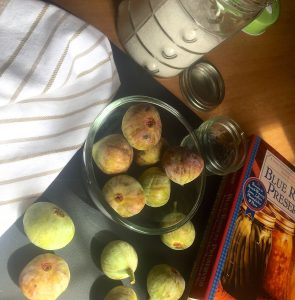
The first batch of homemade fig jam that I made, started with a problem - I had ordered the fresh figs online and they came to me all green and semi ripe and with no flavour to speak of. Careful cooking and a dash of fresh mint leaves turned them into the yummiest jam you will ever have (till I post my mango jam recipe, of course -wink wink!). By the second batch, I felt like an Pro - it was sooo easy! The mint leaves were from my tiny balcony herb garden and is an aromatic peppermint which makes you feel on top of the world - sometimes I pluck and crush a leaf just to feel good!
When using semi ripe figs for a homemade fig jam, you need to cook them for a good 10 minutes in very little water, before you add the sugar and proceed as per the recipe. For regular ripe figs, just follow the instructions below. Do add mint leaves, it gives a big oomph to the jam! Happy Jam Making! And do check for my Mango Jam recipe, it should be up in a few days!
I will write a separate post on sterilising the jars and storing the jam in them. For now, there are many resources online which you may please refer for canning or for putting the jam in jars.
My recipe for homemade fig jam is for a small quantity of jam. It contains no preservatives except for the natural preservation of the lemon juice. Once the jam in the jar has cooled, close the lids tightly and keep the jar in the fridge. It should last upto 10 days without problems. Ensure you use a clean dry spoon to remove the jam from the jar.
"Recipe"
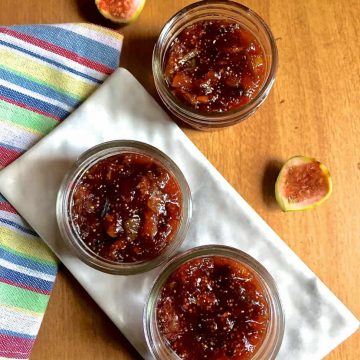
Homemade Fig Jam No Pectin -Easy Step by Step Guide
Ingredients
- 400 gms Figs chopped ripe figs-about 3 ¾ cups
- 200 gms sugar about 1 cup (50% of the weight of the sliced figs)
- 1 tablespoon lemon juice freshly squeezed - ½ an ounce
- ½ teaspoon mint leaves finely minced
Instructions
- Wash the figs. Slice away the stem and a little of the thick base.
Slice the figs into even sized pieces, about ½ an inch in height.
Weigh the sliced figs.
Squeeze lemon juice and keep it ready for use.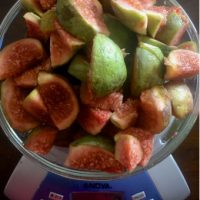
- Place the figs with 50% of their weight in sugar. If the figs are not very ripe and sweet you can go upto 55% - 60%.
Add ½ tablespoon lemon juice and stir it all in till the sugar is moist all over and no dry bits of sugar remain.
Let the figs sugar lemon juice mixture stand for 15 minutes.Alternatively:If using semi ripe figs, first cook them on low heat in very little water – about 30 ml or ⅛ of a cup, for about 10 minutes, stirring frequently. Add a little more water (a tablespoon at a time) if you find it becoming dry. When the fruit softens up, transfer it to a bowl, add the sugar and lime juice and let it stand for 15 minutes as in the instructions below. Continue as per the instructions.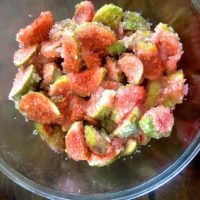
- Meanwhile keep a few spoons in the freezer for the spoon test ( I will explain this in a bit, if you are not already familiar with the test.)
- The chopped figs and sugar mixture would now have released some liquid. Transfer the mixture to a wide thick bottomed pot. Check that the volume of fruit is not more than half the height of the pot, as it needs space while cooking.
- Cook on high heat for a minute and then reduce to low heat. Cook, stirring frequently, till the sugar melts and the mixture begins to bubble (mine took just 5 minutes, but with larger volumes it could take upto 10 minutes). Add the fresh mint leaves, finely minced, stir them into the fruit.
- In about 5-7 minutes as you continue to cook the fruit on low heat (stirring frequently to prevent the fruit from sticking to the pan and getting scorched), you will see foam forming on the surface. You will now get the lovely aroma of the fruit (and the mint!) Remove the foam lightly with a metal spoon (I used a stainless spoon with a longish handle) and discard. Its ok if you don't get rid of all the foam. Occasionally no foam may form. Thats okay too! Cook, stirring off and on until the foaming has subsided - about 15 minutes or so.
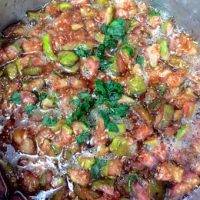
- Taste the jam. (Mine was quite sweet, so I had to add more lemon juice). Add a teaspoon full of the lemon juice, stir it in and taste again.
You want to get it right now - sweetness with a hint of tartness -just barely there. If its still only sweet, add a little more lemon juice (careful now, you don't want it all lemony). Stir well.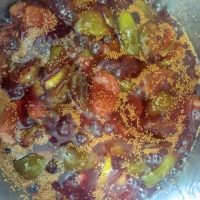
- Cook the jam on low heat for another 10-15 minutes till the bubbles begin to reduce and the jam thickens at the sides of the pan. Keep stirring at the edges and the bottom - you don't want to jam to catch and scorch!
- Once the jam thickens, take it off the heat. Its better to take the jam off the stove early and test for 'doneness'. Once the jam is overcooked, there is nothing you can do but if it is not yet done, you can always put it back on the stove again. Now for the spoon test (see the link to the Serious eats post that I have given in the write up above the recipe). Remove one of the spoons from the freezer. Drop a little jam on the spoon and set it back in the freezer for 5 minutes. Take out the spoon, tilt it and check- if the jam moves slowly but does not run down the spoon, it is done. If it slides down fast and is runny, take the pot back on the heat and cook for a few minutes and then do the test again (don't forget to keep stirring, every time the pot is on the stove)
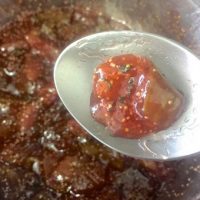
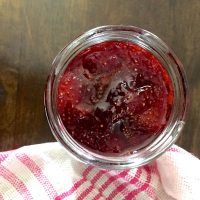
- Once the jam passes the test and its ready, transfer when still hot to clean jars. Wipe the top of the jars with a clean tissue. Close the jars when the jam is cool.


Comments
No Comments